Monday, February 28, 2011

My first Giveaway!

It has been a month now since I was contacted by CSN asking if I was interested in offering a $20 giveaway to my readers.  I was not sure about it, it is new territory for me but thought ‘what the hey’, no sense in looking a gift horse in the mouth.  
I emailed them again today to be sure the offer was still open (it has been a month) and received a prompt and gracious reply in the affirmative.  So this is an offer for $20 to use on any of their sites.
I have been meaning to get photos of a project I want to get started on.   And this giveaway gave me the incentive I needed.  My under stairway wall….
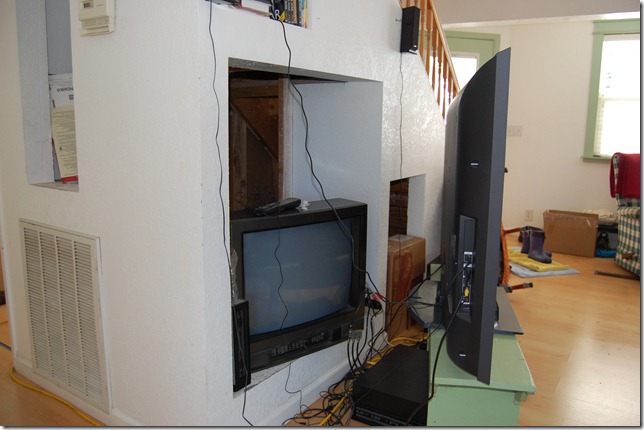
hole
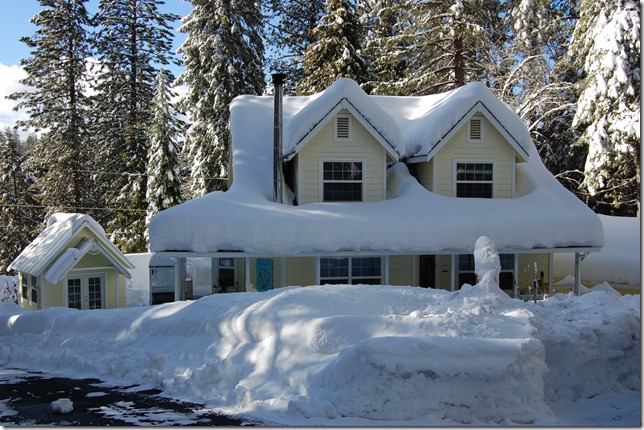
Messy, isn’t it.  At one time, there was a large television that fit snugly into that space, it was tidily tucked inside, all cords and dangly things hidden behind but that beast bit the dust.   I searched hi and lo for another television that would fit that space but I was tough out of luck.  Before buying our behemoth flat screen t.v. we made do with looking at the hole and the smaller t.v.  It was okay in a pinch.  My idea for this wall is to close in the holes and put boards horizontally across the entire thing, on the cheap.  Like pallet boards…but my pallets are buried under this…
pallet
So that kind of puts that project on the back burner until this stuff melts off, which could be in short order if it warms up.  But in the mean time I can shop for a very much needed LCD TV stand, which is exactly what CSN wanted me to link to.stand
(ignore all the extension cords running across the floor, a temporary electrical problem, which has now been tracked and will be repaired tomorrow, thank you PG&E)
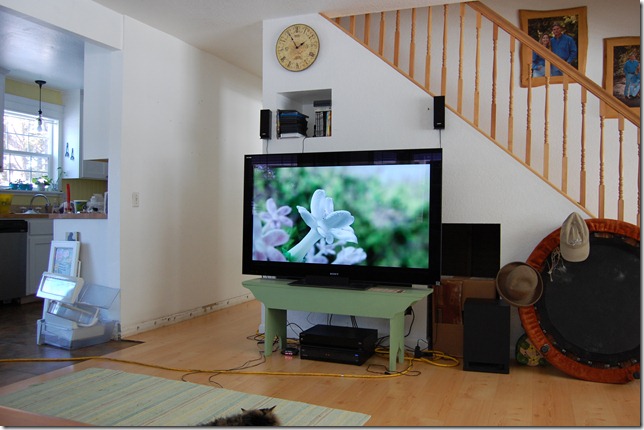
As you can see our LCD t.v. is just sitting on a garden bench I had built a year or so ago.  The DVR and sound system are just sitting on the floor.  Not much style just making do for the present.  I visited the TV stands offered from CSN.  I found some pretty nice ones.  I was intrigued by the Fireplace t.v stands.  We have a woodstove so I don’t need that feature but I thought it neat for those who don’t have a fireplace or woodstove. 
So on to the good part…I am going to make this very easy for everyone.  To enter just leave me a comment.  You can tell me if you think the horizontal boards (kind of a cottage look) is a good idea on this wall or just say ‘hi’.  
For my next post I am working on a backyard chicken article, especially for a reader who requested more info on my chickens. 
Tomorrow, my mom and I are going to get our Black Copper Maran chicks.  Woo hoo! 

Contest will end March 8th at 8pm.
15qt75e[1]

Friday, February 25, 2011

Tuscan Floor Cloth

Do you have a kitchen floor that needs some help?  Maybe it is drab, beat up or just plain ugly. 

Mine is not bad, just dark and to lighten it up I decided to paint up a floor cloth.  The beauty of floor cloths is you can change them out with ease.  I like to change the color scheme in my kitchen seasonally.  I like the Tuscan colors of golden yellow, ruby red and burnt sienna for the Fall and Winter and switch out to some more beachy colors such as aqua, some soft greens etc in the Spring and Summer.

This project is fairly inexpensive.  I picked up a remnant piece of linoleum from Home Depot.  They sell them in various sizes.  Measure your kitchen floor and cut to size.  Or if you have a large kitchen leave it as it.  I have a rather small kitchen so I did have to trim down the piece I bought but is was not hard.  A good straight edge comes in handy along with a sharp pair of scissors.

  My goal was to paint a floor cloth to match my Bon Appetit sign:

You are going to work on the back of the linoleum.

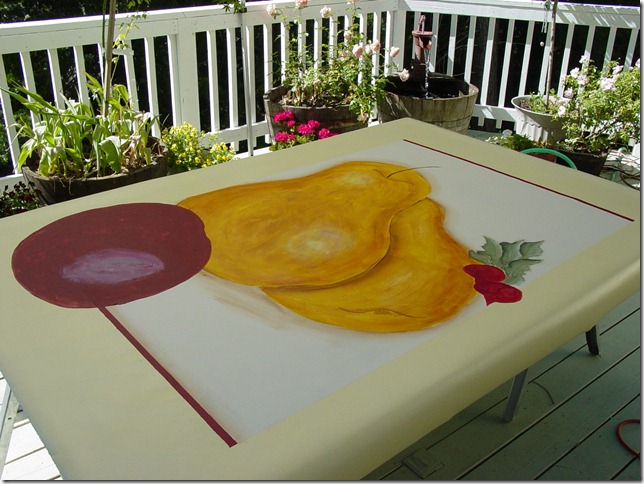
First thing is base coating.  I had read somewhere that using an exterior latex was best as it has more flexibility when dried.  So that is what I went with.  I had some exterior in a white color and I rolled it on with a large roller. 

aaat2006 006

I had set up my work table (sawhorses and a sheet of plywood which was not quite wide enough so I had to slide the linoleum back and forth to paint it) under a canopy on my back deck.  Yes, this was done in the summer and right now this deck is loaded down with 4 feet of snow.  (if you want to see what it looks like around here read my post here and add a couple feet of snow) : Snowed In

With my trusty dusty ruler and straight edge I penciled my border line, laid my painters tape along it and rolled on the yellow paint.  Once dry, I penciled and taped the red inner border and painted in the red acrylic craft paint.  Red has less pigment so it may take a few coats to get the depth and coverage you need.  (this project is going to take some time as each layer needs to dry before proceeding, time frames will vary depending on conditions so set up in a area you can walk away from it for periods of time)

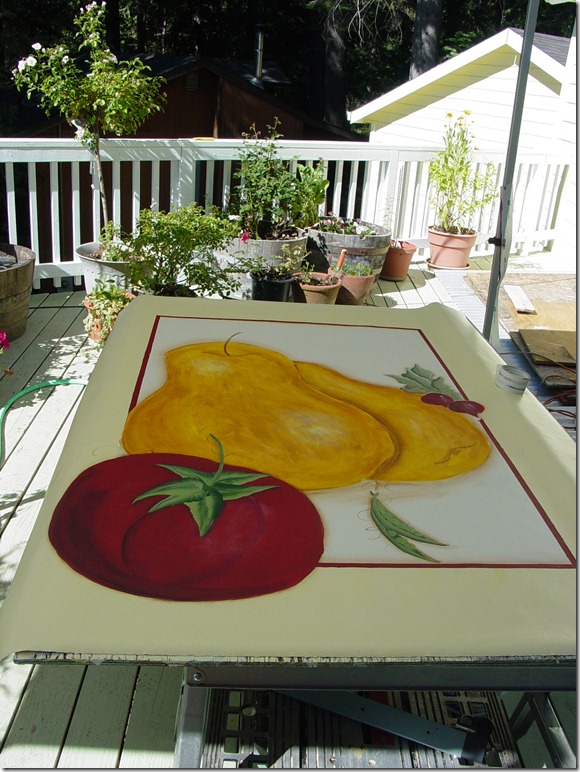
I then sketched up the fruit and veggies and painted them in one layer at a time. I did not even try to keep to scale, I just painted what I wanted.  I have been into Pears for some reason so I chose those as the main focal point.

aaat2006 001

I added the veggies, shadowed then highlighted until I was satisfied. 

aaat2006 003.

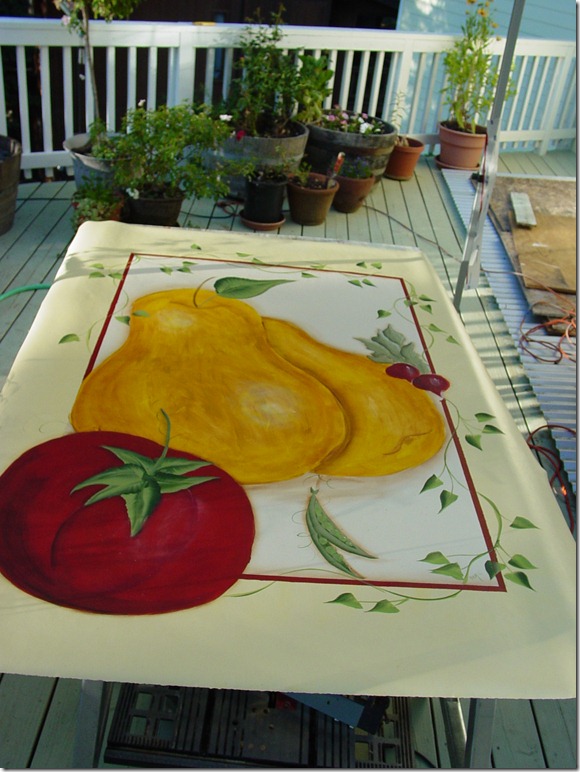
 But it still needed something so I added a few vines and leaves..

aaat2006 004

Ah, yes…now it is just right.   I finish it off with an exterior Varathane in Semi-Gloss (gloss and semi gloss are more water resistant than a Satin or Matte finish) so it is easily mopped clean from time to time.   I recoat it once a year with more Varathane and it is easy to touch up any areas that may get damaged from, oh I don’t know, like dropping a knife on it, point down.

Now to paint one for summer.    Enjoy your new floor!

Pamela


Potentially Beautiful
The Lettered Cottage

Thursday, February 24, 2011

English Delphiniums and a Garden Shed

To enter $20 give card giveaway go to this link: CSN Gift Code Giveaway

Good morning all.  After a brief respite to dig out we are expecting another dilly of a snow storm.  Thankfully, my husband is home this time and will be on hand to do the majority of the shoveling.  He is still slogging away on the plans (ie: eBook) of my studio. I should be able to post it by next week.
In the meantime I stumbled upon this blog and fell in love with this garden shed.  All reclaimed materials.
Garden_Shed[1]Garden_Shed_001[1] 
Garden_Shed_002[1]
Actually I fell in love with the entire garden section of this antique mall in Portland, Ore.  My Brother in law lives near Portland with his family and we have been meaning to get up there for a visit.  I will put this place on my list of “must” visit spots.
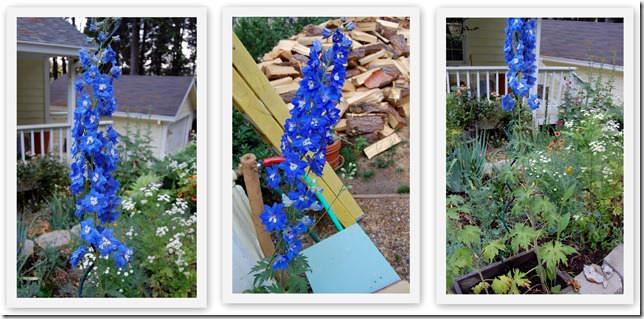
I was excited to receive my English Delphiniums seeds this past week.  They seem to grow very well here and I first gave them a try a few years ago.  In my move this past year I lost many that I had dug up (twice) so I needed to replenish my stock. 
circle20072[1]
I nabbed these photos from this website: Alaska Garden.
I buy my seeds from Dowdeswell’s in New Zealand.
They are the only suppliers of English Delphiniums seeds I have found so far.  (if anyone knows of any others, please share) I have my seeds tucked into the refrigerator until I can get them started. Here is a shot of my piddily few left.
0069
I LOVE this pure blue. 
Now I am off to frost some pumpkin bars. 
enjoy
Pamela

this blessed nest

Sunday, February 20, 2011

A Sewing Sunday

After a harrowing few days of constant snowfall I enjoyed seeing the sun shine today.  The light bouncing off the white snow made for a bright day indeed!

I spent most of my day in my sewing room working on some projects I started over 6 months ago, which got shelved when we moved.
So here is the one I am sharing today...(I actually used 3 pair of rip torn jeans to get 6 panels as some of the legs were torn up too)


Last year I bought an eBook on making skirt patterns for myself using my own measurements. It was easy to follow and I started with the 6 panel skirt.  
This is the pattern piece I made using my own measurements:


Since this was a practice run I used jeans that were headed for the rag bag to cut my skirt from. They were ripped and stained but I figured this would be for casual wear so no big deal.

To dress it up and to cover some stains I decided to paint on some trumpet vine.


A closer view.


There is a stain near the waistline that I have not figured out what how to deal with yet.  Paint more flowers or add a little pocket?

I would've modeled it for you but I have lost 10 lbs since making the pattern so the waist gapes on me now.
That is a good thing so no complaints here!
I can take it in very easily and will do so the next sewing day I get.

I also worked on a Juliet Tunic blouse.  I think it will turn out big as well but it is a practice run for that pattern also, but that is another post.
Enjoy!
Pamela

UndertheTableandDreaming http://linda-coastalcharm.blogspot.com/Texas MonkeyThe DIY Show OffPhotobucketCraft Link parties

Saturday, February 19, 2011

We are officially SNOWED IN!

Woe!  When they said this was going to be a big snowstorm they were NOT kidding!  We have gotten about 4 feet by now in the past 3 days and it is still falling steadily! 
Here is what I had to shovel yesterday morning after I had cleared the same walkway of a foot of snow twice earlier.
That is well over 2 feet of freshly fallen snow, needing to be shoveled by yours truly. Oh, yeah! 
See how far I have to shovel, and that is not the half of it.

Yep, that is my trusty, dusty, 4 wheel drive Suburban buried in the snow right there and quite useless as the plows have not come thru.  Even 4 wheel drive cannot take on this deep slippery stuff.
 After shoveling this I have to go twice as far to get to my chicken house and feed the ladies, fortunately the path to the woodshed is the same as to the chicken house but since I had not shoveled the foot of snow fallen on it the day before I had even deeper snow to move! Oh my aching back!

I lost power the night before, no surprise as I am sure all this heavy snow fall has taken down some trees. They get so heavy that the weaker ones just succumb and when these babies fall they take out everything around them. How would you like one of these falling on your house.

With no power (which means no internet) I was amazed at what I accomplished.  After digging my way to the road and to the chicken house I jumped right in and started on my house.  I super cleaned the upstairs, unpacked a box or two that had yet to be touched since we moved back here in July! I swept the entire downstairs, took a hot spa bath (to ease my back from all the shoveling), made a batch of blackberry jam (my range is propane and works great even if the power is off, gotta love gas stoves), stewed some chicken to make a dish with, crocheted a dish cloth, part of a scarf and tested out a tank top pattern than I ended up not liking and quit that.  Phew! Lesson learned.  I am going to have to set strict limits on myself when I am on the internet so I can keep on getting things done.
My day did not get better...the power did come back on at about 2:30pm.  My husband called on his way home from his business trip (which was a success by the way) and was sicker than a dog with the flu.  I told him of the road conditions but did not suggest he not even TRY to get up to our house in his truck.  He has a one ton duelly 4 wheel drive with aggressive snow tires on it. 
At 3:30 I get a call from him, he is stuck 3 blocks from our house in the deep snow covering the road.  I know I cannot get the Burb out to drive down to get him and was completely taken by surpirse when I step onto the road and sink to my thighs in the snow.  I had more than 3 blocks to get thru to get to him.  I was not looking forward to this trek.  I had a shovel in each hand and I had to use one to shovel a bit of a path.  I get a block and fortunately my neighbor had been out and had walked in the snow so I used his foot steps to walk in, the snow still came to my knees but it was much easier than the thigh deep stuff.
I finally get to him and it takes an hour of shoveling, a neighbors help and putting chains on his truck (they were still in the package we had bought them in about 10 years ago, we have never had to use them)
to get him unstuck.  He pulled down to the only parking space in the neighborhood that was plowed and many neighbors were parked down there too, we all call it the Gazebo.  We grabbed his stuff and the shovels and hiked back home.  He blazed the trail and was amazed I was able to get to him thru all that deep stuff. It was quite the adventure neither of us want to repeat.  He headed straight for a hot shower and I cleaned up all the snow that fell off our clothes and boots when we stepped into the house.
Now this morning there is a new 8 inches to shovel and I cannot even get to my studio.  There is 4 feet in my path to it.

My husband is still down with that flu so it is up to yours truly to get out and shovel, again. It is quite the workout and I need it.  I woke up so stiff and sore this morning after all that physical work yesterday but what must be done, must be done. Time to bundle up and grab the shovel!
Ah the joy of living in the mountains!
Pamela

For step by step plans of this little cottage nestled in the snow just click my website button.
Related Posts Plugin for WordPress, Blogger...